Upholstering a wooden chair can breathe new life into an old piece of furniture, transforming it from drab to fab with a bit of effort and creativity. This process involves a series of well-executed steps that result in a fresh, personalized look.
Whether you’re a seasoned DIY enthusiast or a novice eager to take on a new project, this guide will illuminate the path to successfully upholstering a wooden chair. Let’s dive into the wonderful world of upholstery and reclaim the charm of your wooden chair.
The upholstery process primarily consists of five steps: removing old upholstery, cleaning and repairing the frame, cutting and attaching the new fabric, adding embellishments, and finishing touches. Initially, you will need to carefully remove the old upholstery preserving the fabric shapes as a template for the new one.
Afterward, you need to clean and repair any damage to the wooden frame. The third stage involves cutting the new fabric according to the old one and attaching it securely.
If desired, add any embellishments such as buttons, trim, or tacks. Finally, ensure the upholstered chair is neat, with all fabric edges tucked away and everything secure. Throughout this procedure, precision and patience are key to achieving a professional and satisfying result.
Materials Needed
To embark on this upholstery journey, the following tools and materials will be essential:
- Fabric: Choose a durable, upholstery-grade fabric that complements your décor and can withstand significant wear and tear. Remember to buy extra fabric to account for errors and pattern matching.
- Staple Remover/Pliers: This tool will help you remove the old upholstery staples and nails from the wooden chair without damaging the frame.
- Staple Gun and Staples: A staple gun is crucial for attaching your new fabric to the chair frame. Make sure to choose an upholstery-grade staple gun that can handle the thickness of your chosen fabric and the hard wooden frame.
- Scissors: A pair of heavy-duty fabric scissors will aid in cutting the new fabric with precision.
- Foam and Batting: Depending on the condition of your chair’s existing padding, you may need to purchase new foam and batting to provide comfort.
- Hot Glue Gun: This is useful for securing any loose fabric edges and for attaching embellishments, if required.
- Upholstery Needle and Thread: This will be needed if you decide to add buttons or to stitch any areas of the fabric.
- Wood Cleaner and Sandpaper: You’ll need these to clean and prepare the wooden frame, ensuring a smooth and clean surface.
- Tack Hammer and Upholstery Tacks: For those preferring a traditional finish, upholstery tacks provide a classic look. The tack hammer helps to secure these effectively.
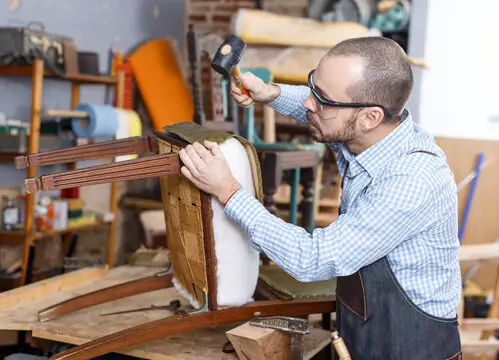
Removing the Old Upholstery
Start by turning the chair upside down to gain easy access to the staples or tacks holding the fabric. Using your staple remover or pliers, carefully pry up all the staples or tacks securing the old fabric to the chair.
Be cautious to avoid damaging the wooden frame in the process.
Once the fasteners are removed, gently take off the fabric, keeping it intact as much as possible. This piece can serve as a template for cutting your new fabric. If the chair has a seat cushion, lift it from the frame.
Now, inspect the padding underneath. If it’s still in good condition, you can opt to reuse it.
However, if it’s worn out or has an unpleasant odor, it’s best to replace it. Remove the old padding by pulling out any staples or tacks holding it in place.
After all old fabric and padding are removed, clean the wooden frame with wood cleaner and lightly sand any rough areas with sandpaper. This will ensure a smooth surface for your new upholstery.
Prepping the Chair
Cleaning and repairing the wooden frame
Once the chair is stripped of its old upholstery and padding, it’s time to focus on the wooden frame. Begin by thoroughly cleaning it with a quality wood cleaner.
Apply the cleaner onto a soft cloth and gently wipe each part of the frame, ensuring you reach all the crevices and carved areas. If there’s stubborn grime or old varnish, use a soft scrub brush to gently scrub it away, taking care not to damage the wood.
After cleaning, inspect the frame for any damages like cracks or loose joints. If you find any, these should be repaired before proceeding. Minor cracks can be filled with wood filler.
Apply the filler, let it dry according to the manufacturer’s instructions, then sand it down to blend with the surrounding wood. Loose joints can be strengthened with wood glue. Apply glue to the joint, then tightly clamp it until the glue dries.
Once the chair is clean and any needed repairs are made, give the frame a light sanding to remove any residue and create a smooth surface for the new upholstery. Use fine-grit sandpaper for this task.
Wipe down the chair with a tack cloth to remove any dust from the sanding. Now, your chair frame is ready for the new upholstery.
Sanding and Refinishing the Frame
If your chair frame has scratches or dull spots, or you simply wish to change its color, sanding and refinishing may be necessary. Start by sanding the entire frame with medium-grit sandpaper to remove the old finish.
Make sure you sand along the grain of the wood, and not against it, to avoid scratches.
Once the old finish is removed, wipe the frame with a damp cloth to get rid of any dust. Allow the chair to dry completely before proceeding. Now that the wood is bare, you can apply the new finish.
Choose a wood stain, paint, or clear finish that suits your design plan. Apply the finish according to the manufacturer’s instructions, usually using a paintbrush or cloth. Let each coat dry thoroughly before applying the next. Once the final coat is dry, your chair is now ready for the final step – upholstering.
Cutting the New Upholstery
Credit: Getty Images/iStockphoto
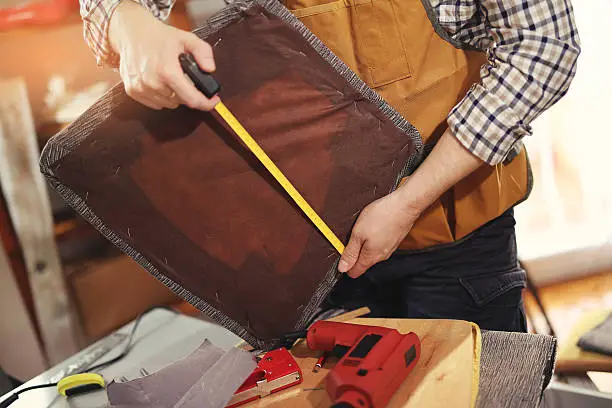
Measuring and Cutting the New Fabric
To begin upholstering your wooden chair, the first step is to measure and cut the new fabric. Using the old fabric pieces as a template, measure and trace these onto your new fabric.
If the old fabric is not available, measure the chair’s seat and back, adding extra for seam allowances and to wrap around the sides. Use sharp fabric scissors to cut the fabric, ensuring clean edges for a professional finish.
Remember, it’s better to cut slightly larger pieces as you can always trim the excess later.
Measuring and Cutting the New Padding
If your chair requires new padding, you’ll need to measure and cut this as well. Again, you can use the old padding as a guide if it’s available. If not, measure the area of the chair where the padding will go, then add a few extra inches to ensure full coverage.
When cutting the padding, use a sharp utility knife for accuracy. Be sure to cut on a safe surface to avoid any potential damage. Once your padding is cut, you’re ready to start attaching your new upholstery to your chair.
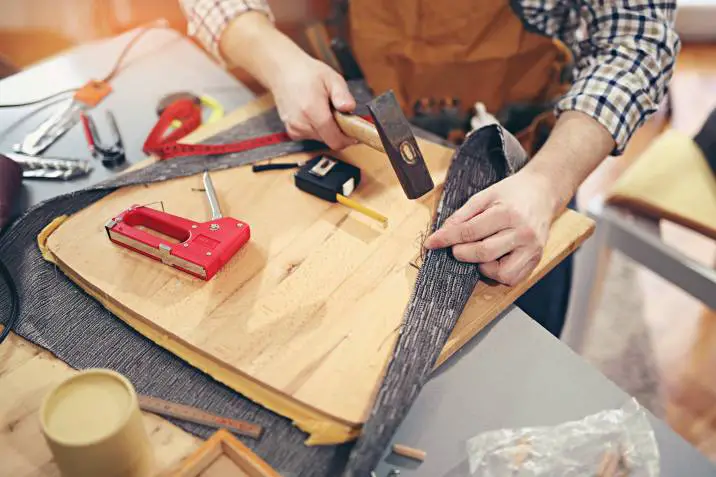
Attaching the New Upholstery
Securing the New Padding
To secure the new padding to your wooden chair, you’ll need a staple gun and the appropriate staples. Begin by laying the padding on the chair, ensuring it covers the entire area and hangs over the edges slightly.
Starting at one edge, carefully pull the padding taut and staple it to the underside of the chair. Work your way around the chair, pulling and stapling as you go.
For corners, fold the padding neatly before stapling to achieve a clean finish. Once the padding is securely attached, trim any excess material from the underside of the chair with a sharp utility knife.
Attaching the New Fabric
When it comes to attaching the new fabric, start by laying the fabric piece over the padded area of the chair, and ensure it’s positioned correctly with enough material to wrap around to the underside. Using the staple gun, begin at one edge, pull the fabric tight, and staple it to the underside of the chair.
Continue this process, making sure to maintain tension in the fabric to avoid wrinkles or loose areas. For corners, neatly fold and tuck the fabric before stapling. Once the fabric is fully attached, trim away any excess fabric from under the chair.
Related Topics:
Finishing Touches
Trimming Excess Fabric
After attaching the fabric, there may be excess material extending beyond the underside of the chair. This excess fabric should be trimmed to give a clean finish. Using a sharp utility knife, carefully cut around the fabric that extends past the staples.
Be cautious not to cut too close to the staples, as you may risk tearing the fabric. Ensure the utility knife is sharp for a clean cut that does not fray the fabric.
Adding Decorative Elements (If Desired)
Adding decorative elements is an optional step that can enhance the overall aesthetic of your upholstered chair. Decorative nails or upholstery tacks can be used around the edges to add a touch of elegance.
To apply, simply hammer them in along the edge of the fabric, ensuring they are evenly spaced for a uniform appearance. Remember, these elements should complement the fabric and overall style of the chair.
As an alternative, you might also consider adding a contrasting fabric trim or even re-staining the wood for a fresh, updated look.
Conclusion
By following this comprehensive guide, you’ve learned how to upholster a wooden chair, transforming an old piece into a stylish and unique seat. The journey, stretching from selecting the perfect fabric to finally attaching it to the chair, demands patience, precision, and creativity.
Although it may seem daunting initially, the process becomes more straightforward with practice. Remember, the key to a successful upholstery project lies in attention to detail, a well-prepared workspace, and quality tools and materials.
Whether you’re preserving a cherished heirloom or updating a flea market find, mastering the art of upholstery ultimately results in a personalized, functional, and aesthetically pleasing piece of furniture. So, don’t hesitate.
Dive into the world of DIY upholstery, and breathe new life into your wooden chair.
FAQs
What types of fabric are best for upholstery?
The best types of fabric for upholstery depend on the expected use of the chair. For heavy use, consider durable fabrics like leather, microfiber, or synthetic blends. For less frequent use or purely decorative pieces, fabrics such as silk or linen can be suitable.
How can I ensure my upholstery tacks are evenly spaced?
To ensure your upholstery tacks are evenly spaced, you can use a ruler or measuring tape to mark the desired placements before hammering them in. Additionally, there are also upholstery tack spacers available in the market which can help maintain an even distribution.
1 thought on “How To Upholster A Wooden Chair: DIY Guide”