
Upholstering a wooden rocking chair can breathe new life into an old, worn-out piece of furniture, transforming it into a comfy, chic, and aesthetically pleasing element of your home decor.
This guide will walk you through the process of upholstering a wooden rocking chair, providing clear, step-by-step instructions and practical tips to make your DIY upholstery project a resounding success. So, let’s embark on this exciting journey of restoring and rejuvenating your beloved rocking chair!
The Problem
Over time, your cherished wooden rocking chair may lose its comfort and charm due to wear and tear. This can result from extensive use, exposure to harsh environmental conditions, or simply aging.
The fabric may become faded, stained, or torn, making the chair less appealing and comfortable to use. Additionally, the padding might have compressed, offering less cushioning and support.
While you could discard this seemingly worn-out piece, reupholstering is a more sustainable, cost-effective, and rewarding choice to restore your wooden rocking chair to its former glory.
Materials Needed
- Fabric of choice
- Foam padding
- Staple gun
- Scissors
- Screwdriver
- Upholstery needle and thread
Disassembling the Chair
Remove the Old Upholstery
First, remove the existing upholstery from your wooden rocking chair. It’s best to do this carefully to avoid damaging the wood underneath. Start by turning the chair upside down and using your staple remover or screwdriver to pry out any staples or nails securing the fabric to the frame.
Be sure to wear gloves for protection. Once you have removed all the fasteners, you can take off the fabric. If the old fabric is in good shape, consider keeping it as a template for your new upholstery.
Detach the Seat and Backrest from the Frame
Next, it’s time to detach the seat and backrest from the wooden frame. This step will depend on how your rocking chair is constructed. Typically, screws or bolts are used to attach these parts to the frame.
Using your screwdriver or wrench, carefully remove these fasteners. Remember to keep them in a safe place, as you will need them when reassembling the chair. Once detached, you can proceed to the next step of upholstering your wooden rocking chair, which involves preparing your new fabric and foam padding.
Cutting and Shaping the Foam Padding
Measure the Seat and Backrest
Start by taking precise measurements of the seat and backrest of your wooden rocking chair. It is important to measure not only the length and width but also the depth, to ensure a comfortable fit. Note down your measurements as you will be using them to cut the foam padding to the right size.
Cut the Foam to Fit These Measurements
With the measurements in hand, proceed to cut the foam padding. Use a sharp utility knife to cut the foam, ensuring that you follow the measurements closely to get a snug fit.
Remember, it’s better to cut a little larger initially, as you can always trim it down later if necessary.
Shape the Foam to Contour the Seat and Backrest
Once the foam has been cut to size, the next step is to shape it to contour the seat and backrest. This will require a bit of patience and precision. Use your hands to mold the foam, pressing it down to mimic the curves and contours of the chair.
For more complex shapes, you may need to cut small darts into the foam. Once you are satisfied with the fit, you can move on to the next step of upholstering your wooden rocking chair.
Attaching the New Foam Padding
Align the Foam on the Seat and Backrest
With the foam padding cut and shaped to align with the contours of your wooden rocking chair’s seat and backrest, the next step is placement. Begin by aligning the foam on the seat of the chair, ensuring it fits snugly and covers all areas.
Repeat this process with the backrest, ensuring that the foam padding aligns perfectly with the curvature of the chair’s back. Also, ensure that the edges of the foam do not extend beyond the frame of the chair – if they do, trim the excess.
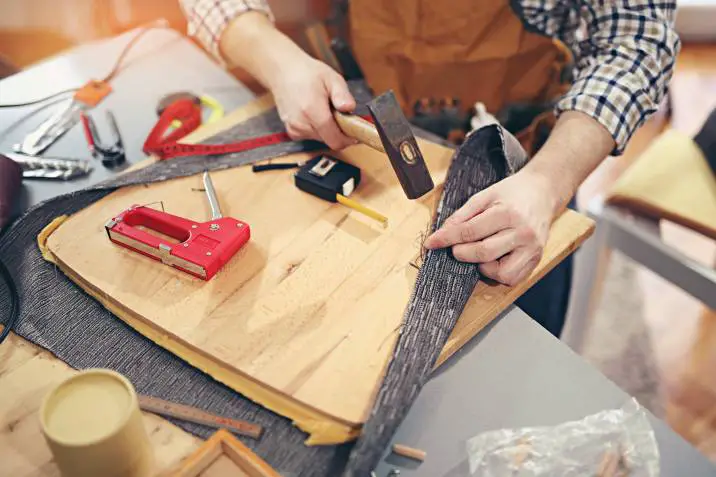
Secure the Foam with Adhesive or Staples
Once the foam padding is correctly aligned, it is time to secure it in place. If you opt for an adhesive, use a foam-friendly adhesive.
Apply the adhesive evenly on the underside of the foam and press it firmly onto the chair. Allow the adhesive to dry as per the manufacturer’s instructions. If using a staple gun, ensure that the staples penetrate both the foam and the wooden frame of the chair.
Start from one side, stapling at regular intervals, then proceed to the opposite side, pulling the foam taut as you go. Remember to staple the corners last, folding them neatly for a professional finish.
Cutting and Attaching the New Fabric
Cut the Fabric to Size, Leaving Extra for Seams
Start by laying your chosen fabric out flat on a clean, large surface. Place the foam-covered frame of the rocking chair on top of the fabric.
Using a fabric marker or chalk, outline the chair’s shape onto the fabric, adding a few extra inches all the way around for seams and adjustments. Once completed, carefully cut the fabric along your marked lines.
Stretch and Staple the Fabric Over the Foam
Begin to affix your fabric onto the chair by positioning it over the foam, ensuring that it aligns correctly with all contours. Starting at the center of each section (seat, backrest), staple the fabric to the wooden frame, pulling it taut as you go.
As you work your way towards the edges, make sure the fabric stays smooth and free of wrinkles. For corners and curves, you may need to make small cuts in the fabric to help it lay flat.
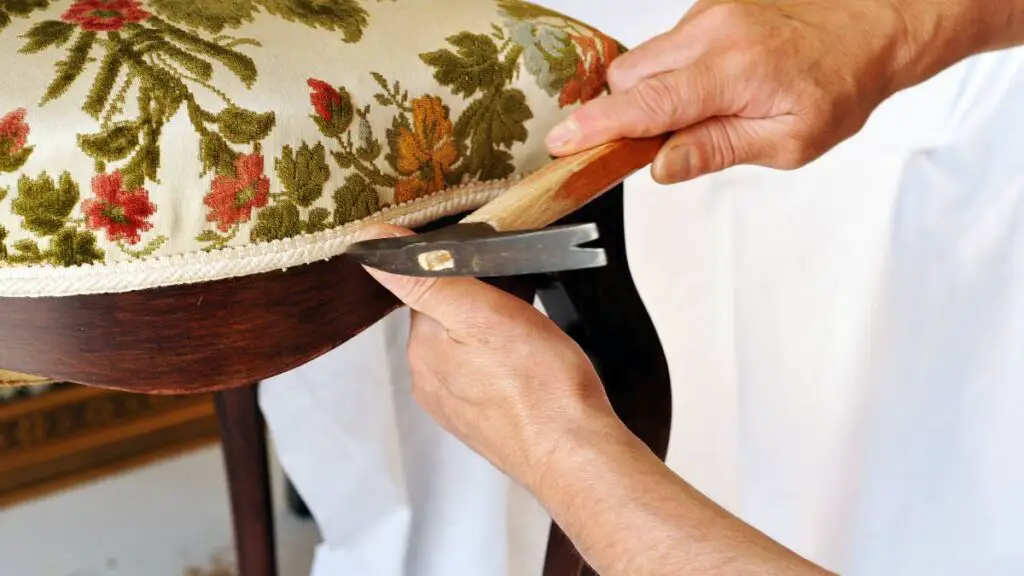
Trim Any Excess Fabric
Once the fabric is securely attached, you can trim any excess. Using sharp fabric scissors, cut carefully around the edges of the chair, leaving enough fabric to cover the staples.
Be cautious while trimming, as cutting too close might cause the fabric to fray or the staples to become exposed. After trimming, you may choose to add a finishing touch like piping or trim to hide the staples and give your upholstered wooden rocking chair a professional look.
Reassembling the Chair
Reattach the Seat and Backrest to the Chair Frame
After completing the upholstery work, it’s time to reassemble the chair. Locate and align the screw holes of the seat and backrest with those on the chair frame. Using the appropriate type of screwdriver, carefully reinsert and tighten the screws.
Ensure that all parts are securely attached, leaving no room for wobbles or squeaks that might affect the chair’s stability and durability.
Make Any Necessary Adjustments for Fit and Comfort
After reassembling, take a moment to sit on the chair and test its comfort level. Feel for any areas that might need additional padding or adjustments.
Examine the fabric’s tension across the chair; it should be tight but not overstretched to the point of tearing. Check the seams and edges for any loose or exposed staples that might need further securing.
Related Topics:
Finishing Touches
Sew Any Necessary Seams
If you’ve chosen a fabric with a pattern or if you want to further secure the upholstery, you may need to sew some seams. Use a thread that matches your fabric and ensures the stitches are neat and even.
This not only strengthens the fabric’s hold but also adds a decorative touch.
Ensure All Staples Are Secure
It’s crucial to double-check all the staples you’ve placed throughout the upholstery process. Any loose or exposed staples can be hazardous. Use a staple gun to resecure any areas that may seem loose, ensuring the fabric remains taut and wrinkle-free.
Admire Your Newly Upholstered Rocking Chair
Finally, take a moment to admire your handiwork. You’ve successfully upholstered a wooden rocking chair, giving it a new lease of life. It’s not only a comfortable piece of furniture but also a testament to your craftsmanship and creativity. Enjoy the satisfaction of a job well done!
Conclusion
Upholstering a wooden rocking chair may seem like a daunting task at first, but with patience, creativity, and this guide, you’ve successfully transformed an old chair into a beautiful and comfortable piece of furniture.
The process taught valuable skills and provided an opportunity to inject personal style into your décor. Whether you used this project to restore an heirloom or revitalize a thrift store find, the newly upholstered rocking chair now stands as a testament to your craftsmanship.
Remember, the charm of DIY lies not only in the end product but also in the journey of creating it. So, each time you sit and rock in your rejuvenated chair, you’ll appreciate not just its comfort, but also the effort and creativity you poured into it.
FAQs
What type of fabric is best for upholstering a wooden rocking chair?
When selecting fabric for your rocking chair, consider both aesthetics and durability. Cotton blends are popular due to their wear resistance and ease of cleaning. If you’re aiming for a more luxurious feel, opt for velvet or microfiber, both known for their softness and longevity.
Do I need any special tools to upholster a wooden rocking chair?
Basic upholstery projects like a rocking chair require some common tools: a staple gun, upholstery needles, fabric, scissors, and pliers. A tack hammer might also be useful if you plan to use any decorative nail heads. It’s best to gather all your tools and materials beforehand to ensure a smooth and efficient project.
1 thought on “How To Upholster A Wooden Rocking Chair”