Do you have a wooden chair that wobbles because the screws no longer hold them together? Stripped screw holes are a common problem that can leave you frustrated, but there is no need to worry. You can fix the problem with simple steps that won’t require professional help or expensive equipment.
In this article, we will show you how to fix stripped screw holes in your wooden chair. We will give you step-by-step instructions that are easy to follow, and we will also give you a few tips that you can use to prevent future stripping.
Evaluate the Number of Stripped Holes
Before you begin the repair, you need to evaluate the problem by checking how many screw holes are stripped. You may have one or several holes that are causing the wobble. Also, examine the size of the holes and whether they are too big or too small.
This evaluation will help you determine whether you need to drill new holes or if you can work with the existing ones.
Remove Any Loose Material
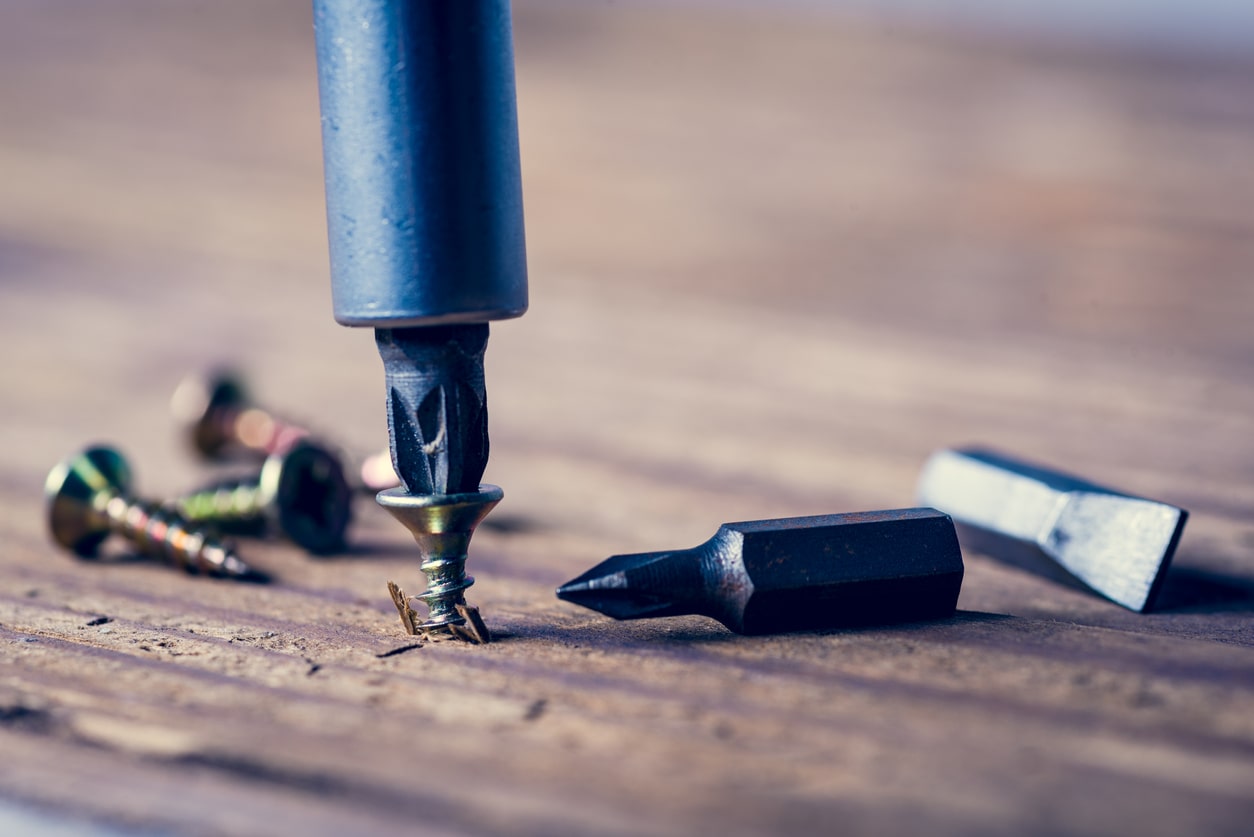
The next step is to remove any loose material that may be in the stripped holes. Often, sawdust, glue, or old screws are left behind when screws are removed. You can use a toothpick, tweezers, or a small screwdriver to remove any debris. Ensure that the hole is clean and clear of any debris.
Fill the Holes with Wood Glue
Once you’ve removed any debris from the stripped hole, the next step is to fill the hole with wood glue. Apply a small drop of glue to the hole using a toothpick.
Ensure that you cover the hole fully but without overfilling it. After applying the glue, let it dry for a few hours or according to the recommended drying time.
Insert Toothpicks and Reinsert Screws
After the glue has dried, insert toothpicks or wooden matches into the hole. Insert toothpicks as deep as you can into the hole, ensuring that they fit well. Break off the excess with your fingers or use pliers to snap it off. The toothpicks will serve as a support system for the screws ensuring that they hold tightly.
After filling and inserting the toothpicks, you can reinsert the screw into the hole. Use a screwdriver to tighten the screw into the hole.
As you turn the screw, the toothpicks will compress and create a tight fit for the screw. When the screw is tight, break off the excess toothpicks or matches.
Sand and Finish the Chair
Once you’ve installed the screws, you can sand any rough edges with sandpaper. Check that the chair is stable, and doesn’t wobble. If it is, you can finish the chair using paint or varnish. This step is optional but will add a protective layer to your wooden chair.
Fixing a Stripped Screw Hole in the Wood with Toothpicks
If you’re up for some DIY woodwork, then eventually, you’ll find yourself facing a stripped screw hole. Not to worry, though! It’s a relatively common issue, and the solution is simpler than you might think.
All you need is some toothpicks, wood glue, and a few spare minutes. The first step is to break off a few toothpicks and dip them in the wood glue. After that, insert the toothpicks one by one into the stripped screw hole, making sure to get as many in there as possible.
Then, let the glue dry, and break off the toothpick ends that stick out of the hole so that they are flush with the wood’s surface. Now, simply screw in the screw again, and marvel at the renewed grip it has on the wood.
This straightforward method of fixing a stripped screw hole in the wood with toothpicks can save you a lot of time and effort in the long run. With just a little bit of patience and DIY spirit, you’ll soon be back to your woodwork projects with ease.
Related Topics:
Conclusion
Repairing stripped screw holes in your wooden chair is an easy process that you can do by following these simple steps. Remember, to evaluate how many screw holes are stripped, remove any debris, fill the holes with glue, insert toothpicks or wooden matches, and then reinsert the screws.
By following this guide, you can save money and time on professional help, and you can restore your wooden chair to its original stability.
Additionally, ensure that you follow the tips for preventing future stripping by not over-tightening screws, using a pilot hole during installation, and reducing the weight or pressure on the chair. Use these tips to enjoy a sturdy chair for years to come.
FAQs
What is the best glue for stripped wood screws?
When it comes to fixing stripped wood screws, having the right adhesive is crucial. There are plenty of glues that can do the job, but the best one will depend on your specific needs. For example, if you need a quick fix, cyanoacrylate (super glue) or epoxy may work well.
If you want something stronger, polyurethane glue or polyvinyl acetate (PVA) might be better options. Regardless of your choice, remember to read and follow the manufacturer’s instructions for best results.
How do you fix a screw that won’t tighten in wood?
When attempting to tighten a screw in wood, it can be frustrating to encounter one that just won’t budge. The first step is to assess whether the screw has stripped the wood or the screw itself is damaged. If it’s the former, try filling the hole with wood glue and toothpicks or matchsticks before screwing it back in.
If it’s the latter, you may need to replace the screw altogether. Remember to use an appropriate size and type of screw for the wood, and don’t overtighten as this can cause further damage.
What to do when the screw keeps turning?
When a screw keeps turning, it can be frustrating and lead to a poorly secured fixture or object. The first step is to try using a different screwdriver, as the one being used may not be appropriate for the type of screw being used. If that doesn’t work, adding a small amount of wood glue or epoxy to the screw hole may provide enough grip for the screw to stay in place.
Another option is to use a larger screw or add a nut and washer to the existing screw. It’s important to handle the situation calmly and methodically to avoid damaging the object being worked on.
2 thoughts on “How To Fix Stripped Screw Hole in Wood Chair? DIY”